Scale XYZ (Inspector)
Unity is a powerful game development engine that provides various tools and functionalities to create interactive and immersive experiences. One essential aspect of game development is manipulating objects, such as scaling them to create visual effects or adjusting their sizes dynamically. In this tutorial, we will explore how to scale XYZ objects in Unity using C# scripts and the Unity inspector.
Step 1: Adding the Scale XYZ Script
To begin, you’ll need to download the Scale XYZ C# script from here and add it to your Unity project’s assets. This script enables us to scale objects in the XYZ direction.
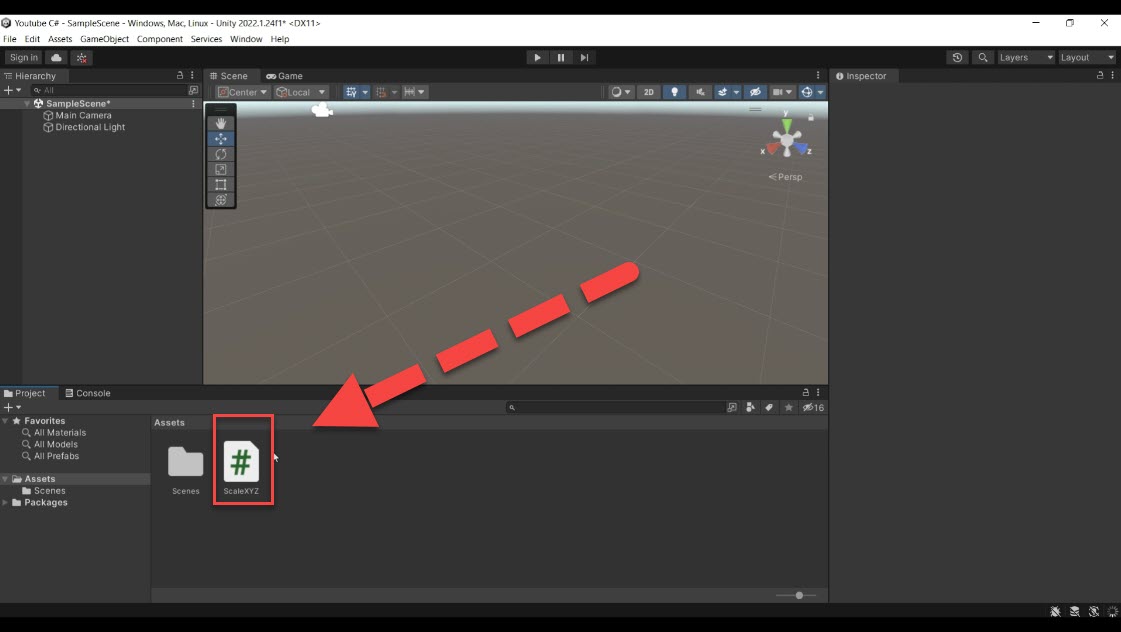
Step 2: Setting up the Scene
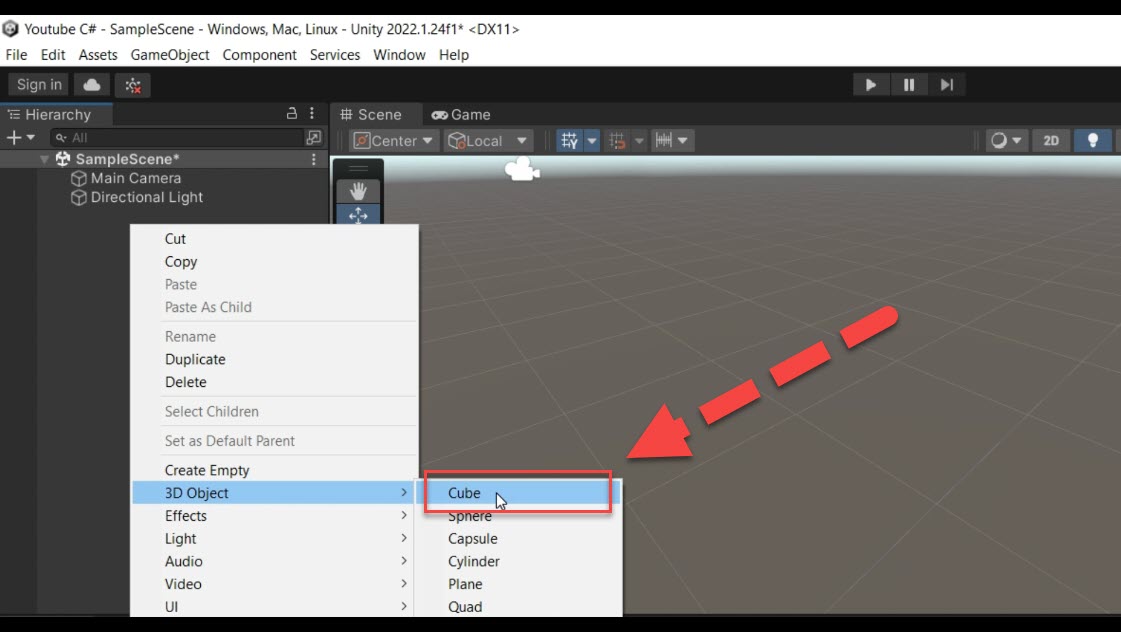
Let’s start by creating a simple cube in Unity. Right-click in the scene hierarchy, go to “3D Object,” and select “Cube.” This cube will serve as the object we’ll scale.
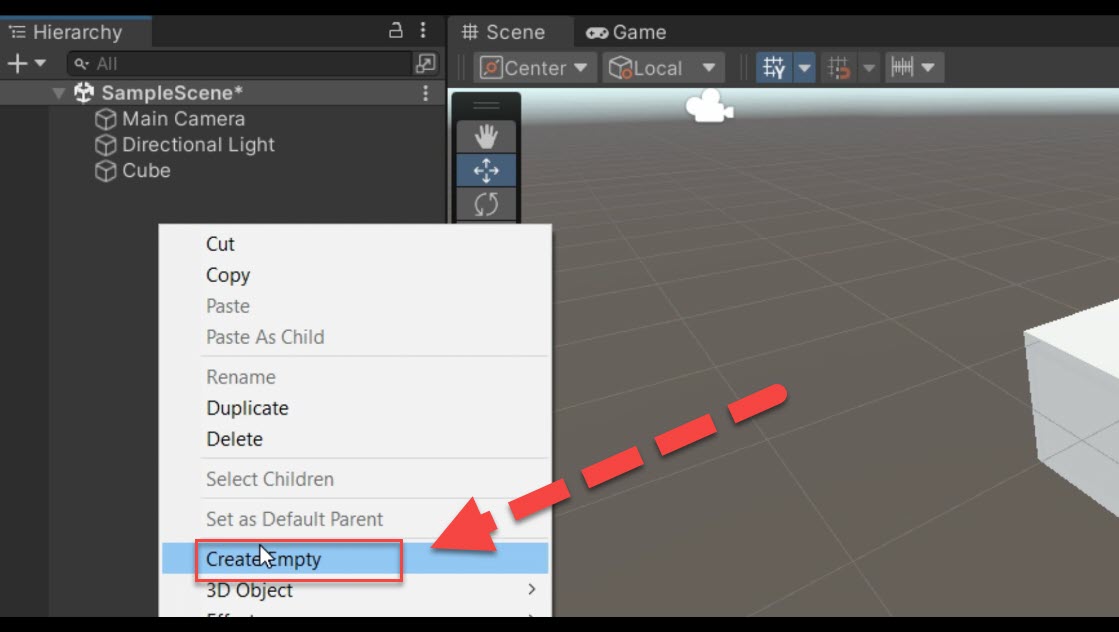
Next, create an empty game object by right-clicking and selecting “Create Empty.”
Name it “Scale XYZ.” Drag and drop the Scale XYZ script onto the Scale XYZ game object.
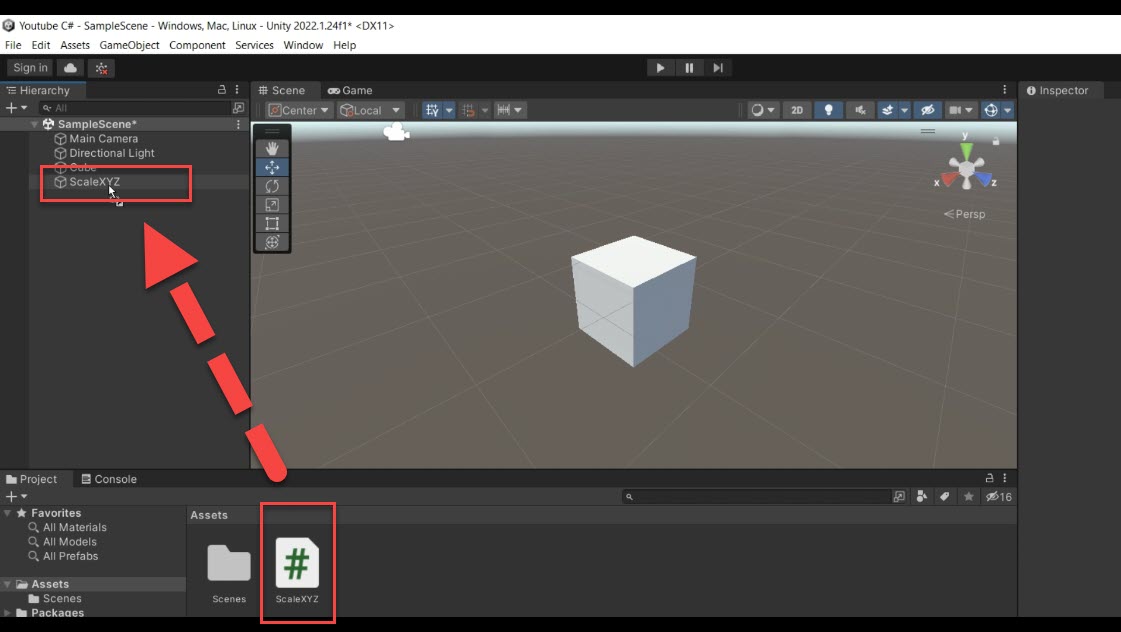
Step 3: Using Sliders to Define Scale
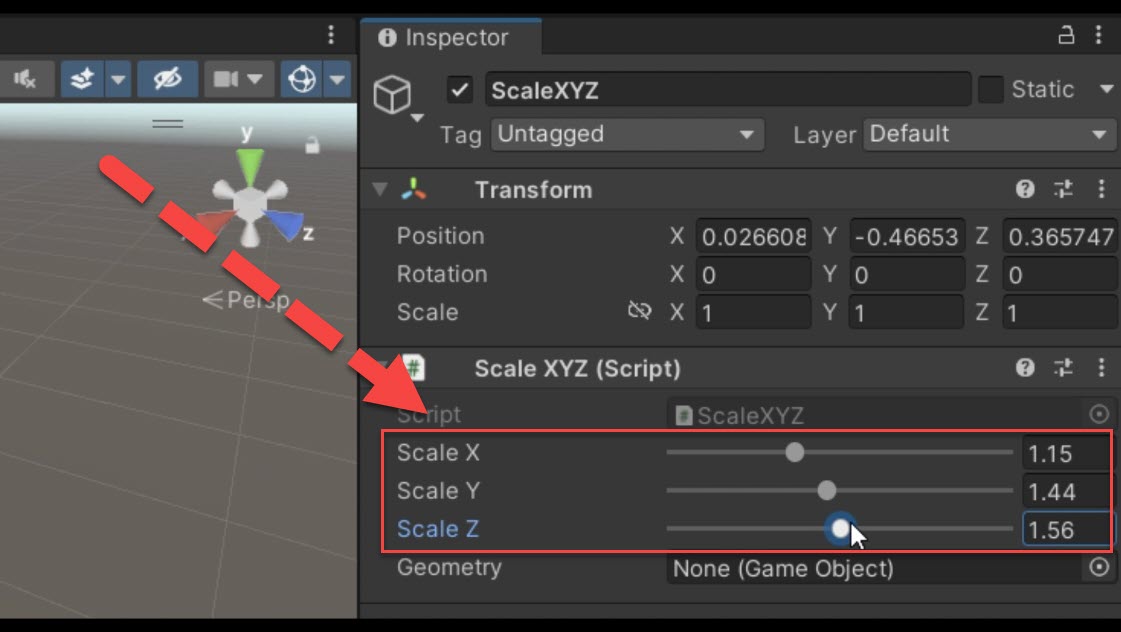
In the Scale XYZ script, we have defined three number sliders for the X, Y, and Z scales. These sliders allow us to adjust the scale values of the object in the Unity inspector.
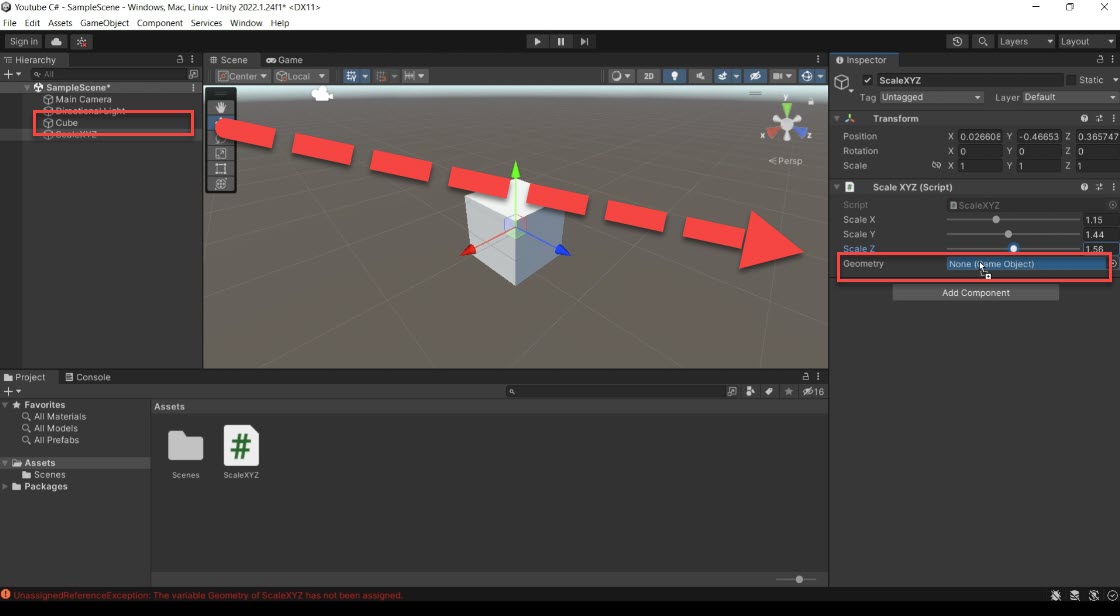
To utilize these sliders, we need to assign the object we want to scale to the “Geometry” field in the Scale XYZ script. Drag and drop the cube onto the game object in the inspector.
Step 4: Understanding the C# Code
Now, let’s take a closer look at the C# code in the Scale XYZ script and understand how it works.
First, notice the “ExecuteInEditMode” attribute above the class declaration. This attribute ensures that the script’s execution occurs in the Unity editor’s scene mode, allowing real-time scaling.
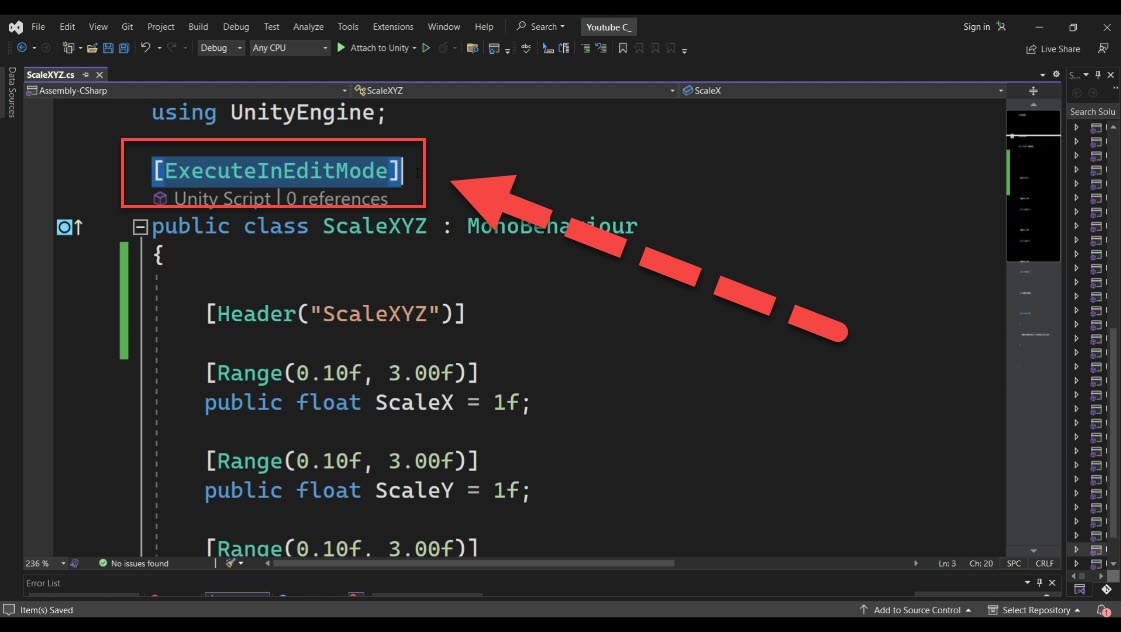
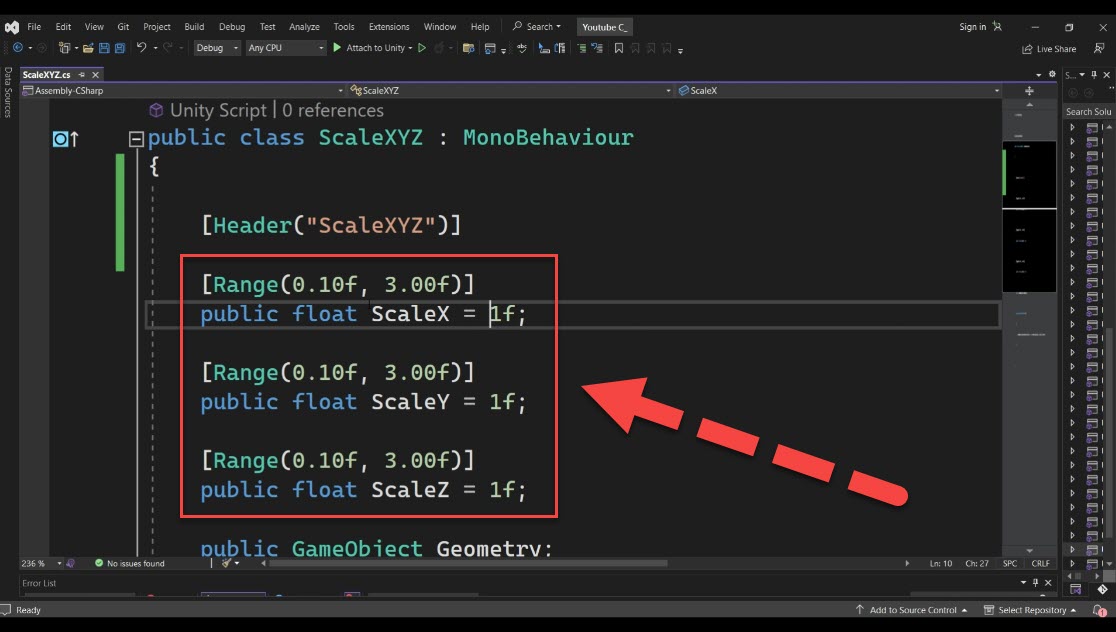
The Scale XYZ class has public variables for X, Y, and Z scales, which are defined as floats. Using the “Range” attribute, we specify a minimum and maximum value for each scale variable. In the Unity inspector, these attributes create sliders for each scale value, enabling intuitive scaling.
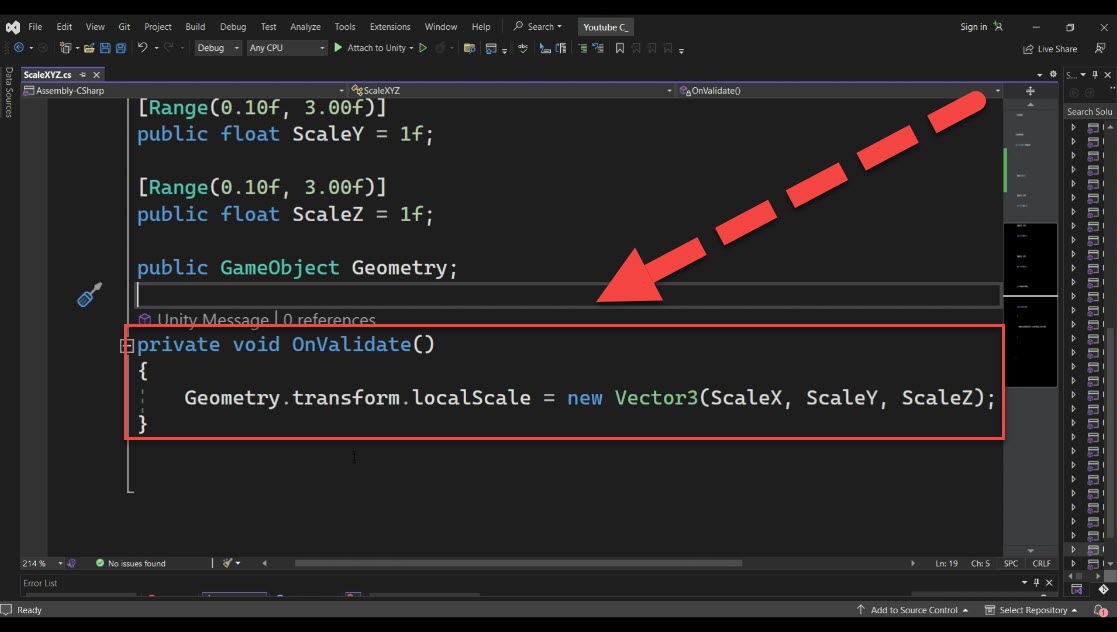
Within the “OnValidate” function, which is called when the script is loaded or when a value is changed in the inspector, we apply the scale values to the assigned geometry. By accessing the geometry’s transform and using the “localScale” property, we set a new Vector3 with the X, Y, and Z scale values.
Step 5: Testing the Scaling
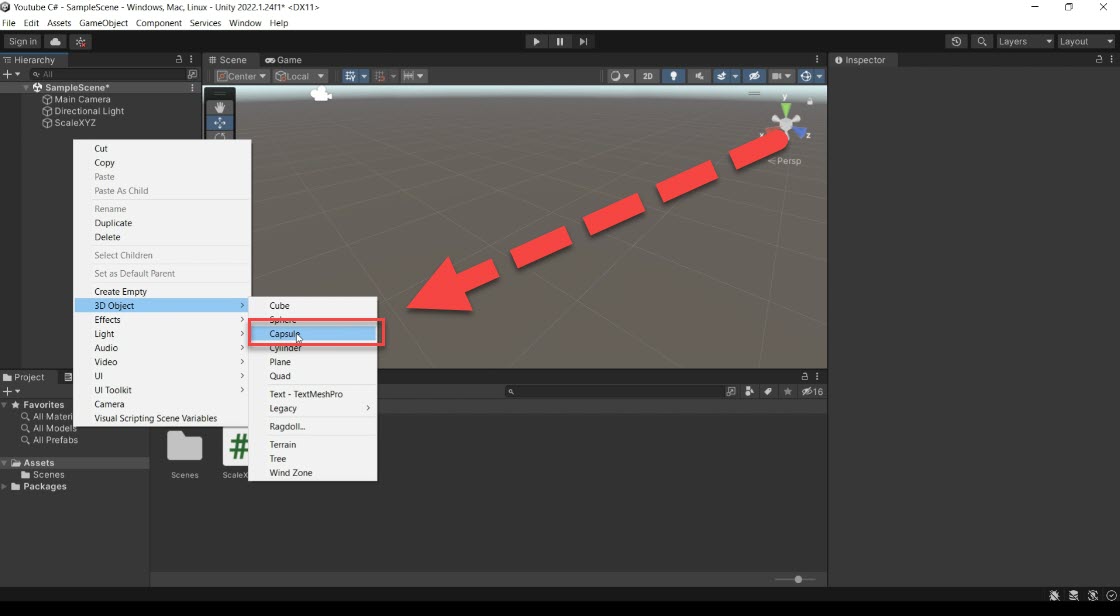
To see the scaling in action, you can delete the cube and add a new object. For example, right-click, go to “3D Object,” and select “Capsule.” Assign the capsule to the “Geometry” field in the Scale XYZ script.
Now, when you run the scene or enter play mode, you can observe that the capsule can be scaled in different directions using the sliders in the inspector.
Conclusion
Scaling objects is a fundamental aspect of game development in Unity. By following this tutorial, you’ve learned how to use the Scale XYZ script and the Unity inspector’s sliders to easily scale objects in the XYZ directions. Experiment with different objects and scales to create the desired visual effects in your games.
Download the c# script from the below link: https://plugpea.com/?attachment=370&document_type=document&download_document_file=1&document_file=4



Responses