Position
In the world of game development, precise object positioning is crucial for creating immersive and dynamic experiences. Thankfully, Unity provides a range of tools and scripts to simplify this process.
In this tutorial, we will explore a powerful position script that allows you to effortlessly manipulate the location of game objects in three-dimensional space. By the end of this guide, you’ll have full control over your object’s position and be able to fine-tune its movement to perfection. So, let’s dive in!
Adding the Position Script
To begin, we need to add the position script to our game object. With Unity’s intuitive interface, this task becomes a breeze. By following a few simple steps, you’ll be ready to take control of your object’s position.
1. Locate the game object you wish to manipulate.
2. Open the inspector window by selecting the object.
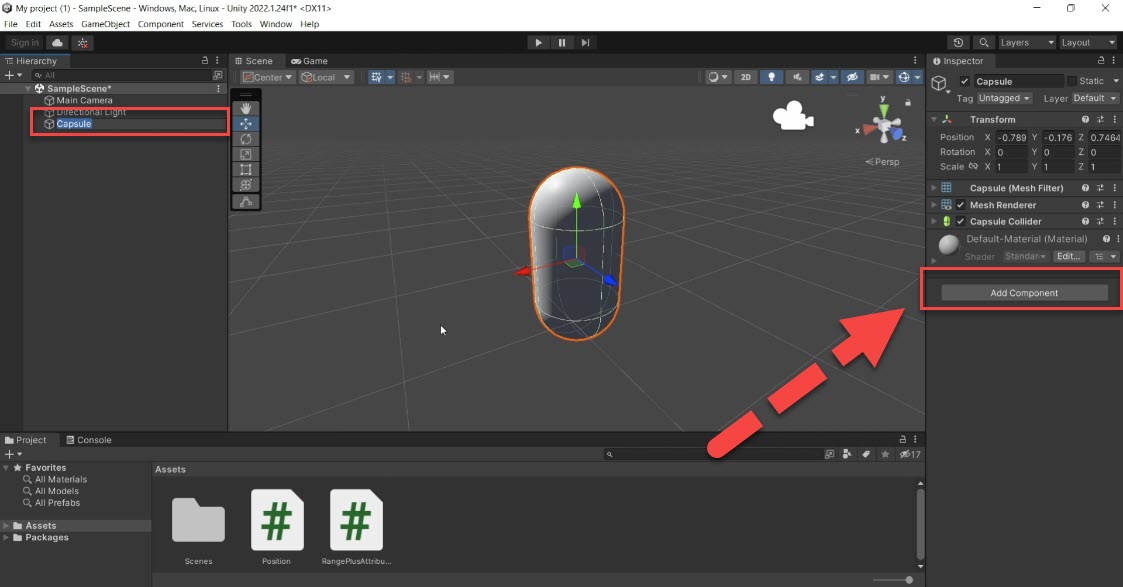
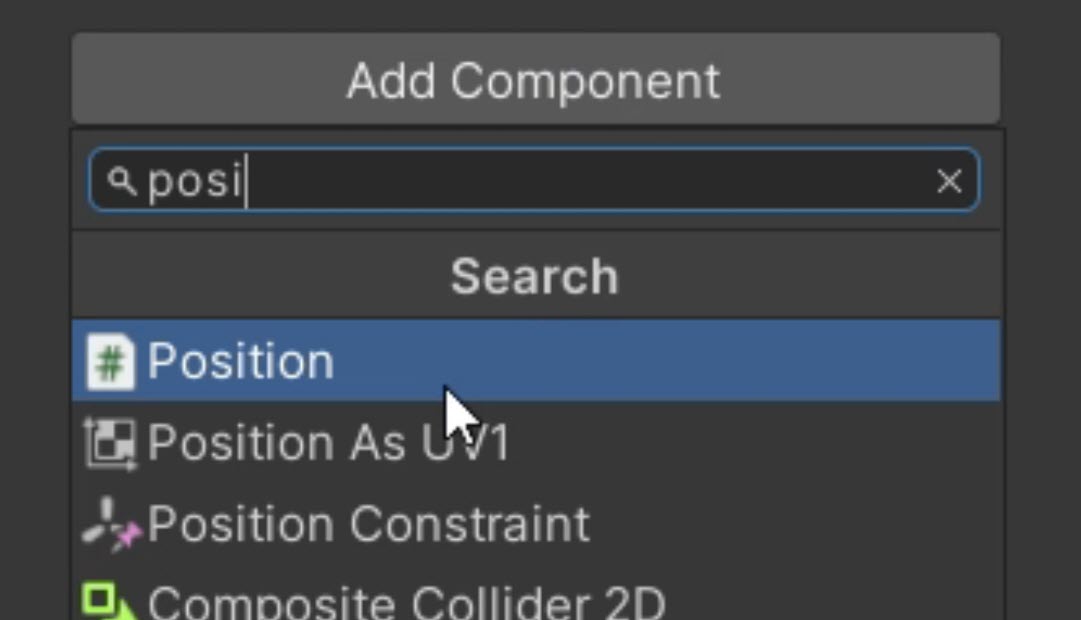
3. Search for the “Position” component and add it to your object.
Manipulating X, Y, and Z Coordinates
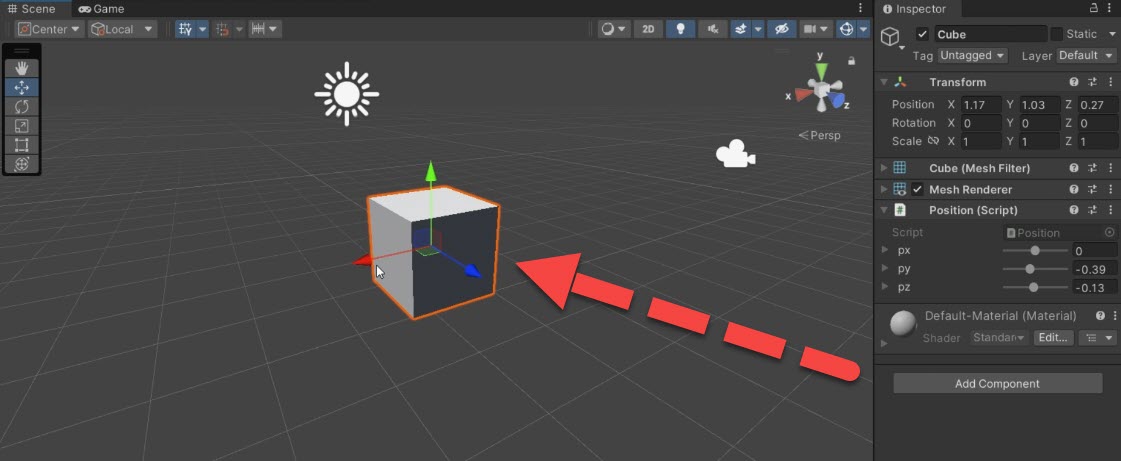
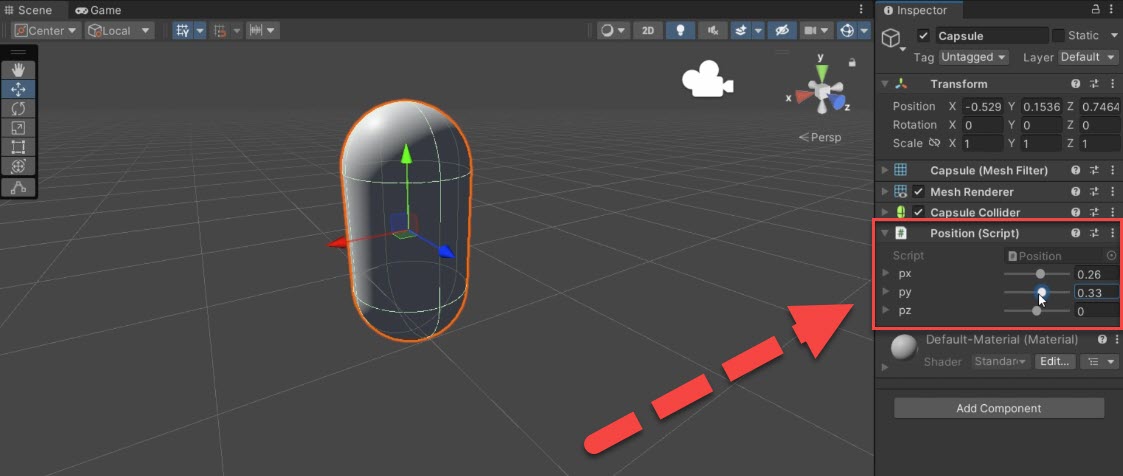
Once the position script is attached, you’ll notice a set of sliders corresponding to the X, Y, and Z coordinates. These sliders allow you to effortlessly change the position of your object along each axis.
1. Adjust the sliders to modify the X, Y, and Z coordinates according to your desired position.
2. Alternatively, you can also use the default drag feature to move the game object around in the scene.
Tweaking Movement with PX, PY, and PZ
To fine-tune the movement of your object, the position script provides additional controls in the form of PX, PY, and PZ. These attributes offer more granular adjustment options.
1. Download the “RangePlus” attribute to unlock advanced customization options for the minimum and maximum values of the sliders.
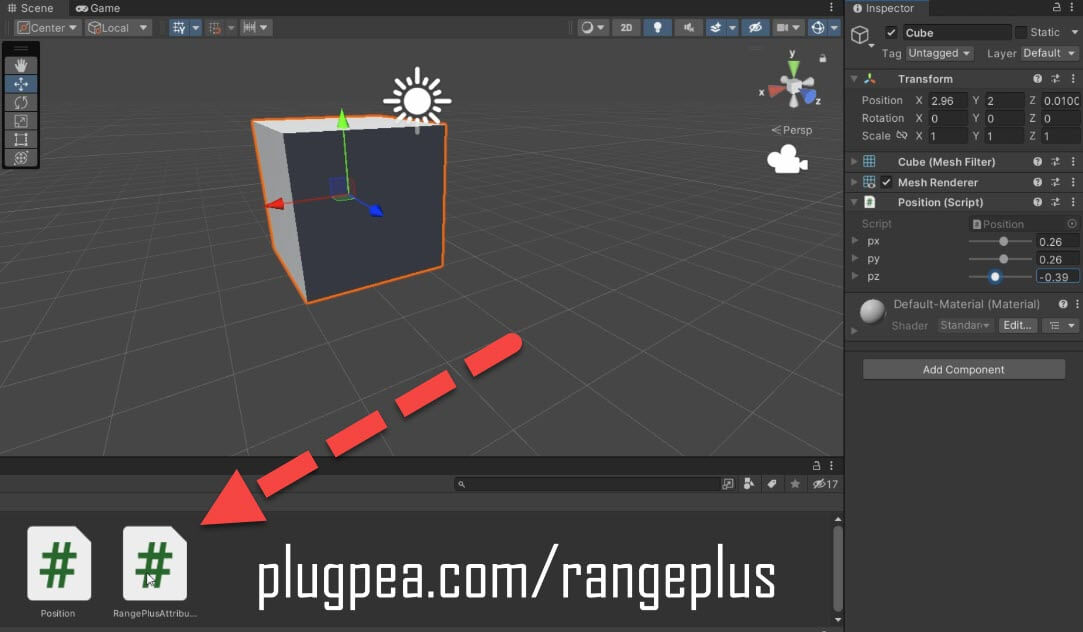
2. Use PX, PY, and PZ to tweak the movement along the X, Y, and Z directions, respectively.
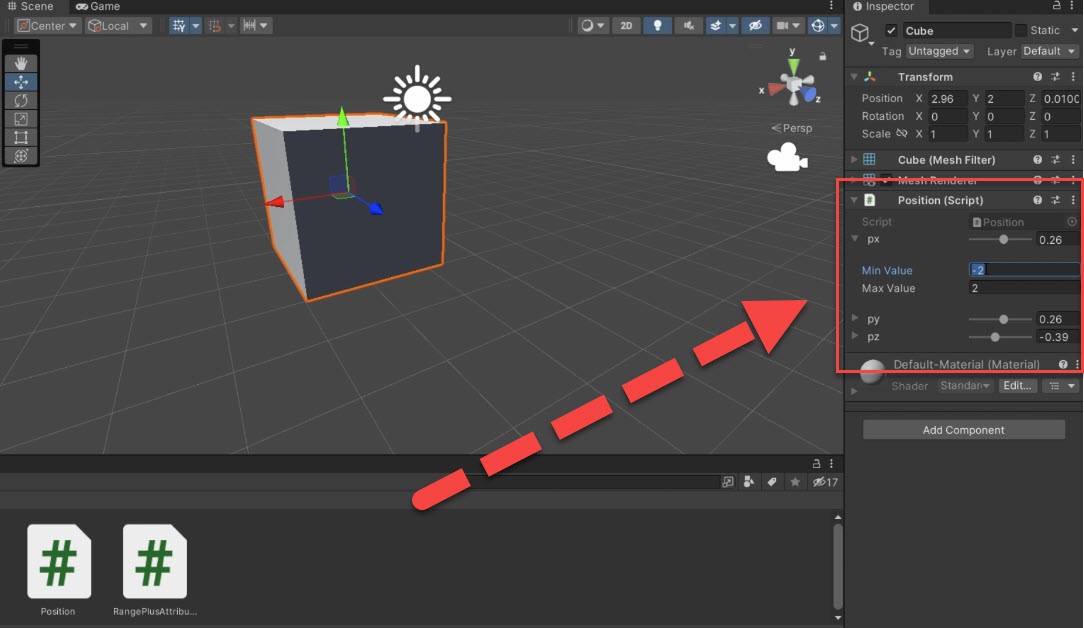
3. Experiment with different values to achieve the desired effect.
Utilizing C# Scripting for Further Control
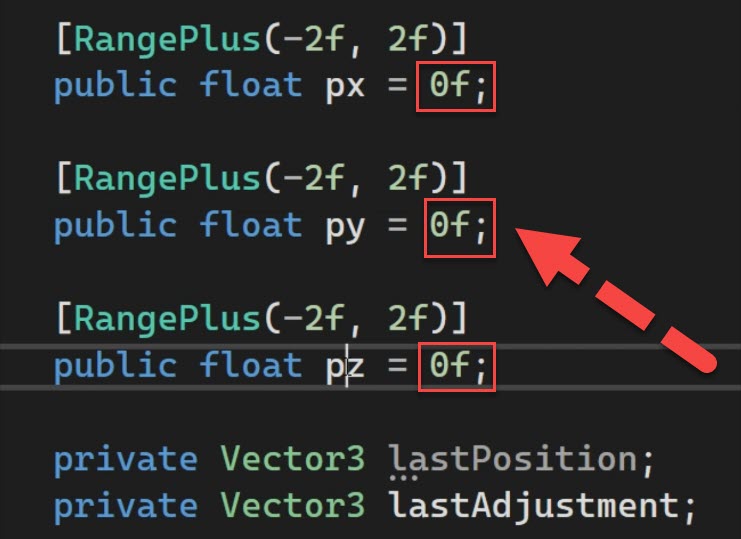
For developers who prefer script-based solutions, Unity allows you to harness the power of C# to enhance your object positioning capabilities. By utilizing the Range Plus attribute, you can expand the range of possibilities even further.
1. If you have the RangePlus attribute installed, include it in your C# script.
2. Alternatively, if you don’t have the RangePlus attribute, you can remove the “Plus” and change it to “Range” in your script.
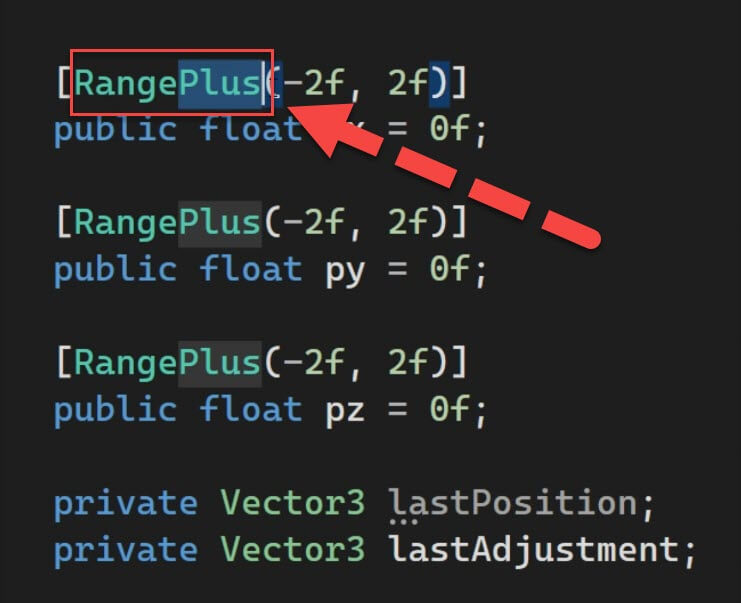
3. Utilize the minimum and maximum values to define the range of the sliders you want to have.
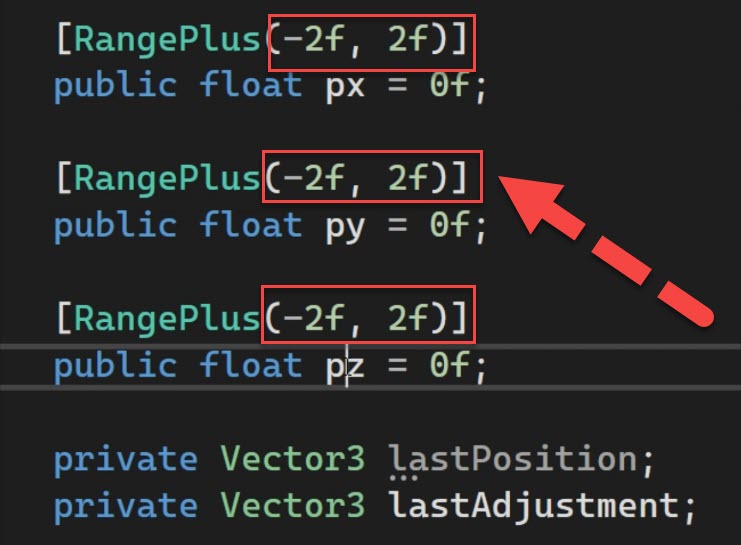
4. Benefit from the default values to establish a starting point for your object’s position.
Understanding the Last Position and Last Adjustment
To ensure a smooth and consistent experience, the position script utilizes two vectors: the LastPosition and the LastAdjustment. These vectors help maintain the integrity of the object’s position when changes occur.

1. By adjusting the sliders in the inspector or making any changes within it, the current adjustment vector (represented by PX, PY, and PZ) updates accordingly.

2. The deltaAdjustment vector is calculated by subtracting the last adjustment from the current adjustment.

3. Finally, you can apply the deltaAdjustment to the object’s position to see the changes take effect seamlessly.

Putting It Into Practice
Now that you have a solid understanding of the position script and its various features, it’s time to apply this knowledge in practice.
1. Create a new game object (e.g., a capsule) or select an existing one.
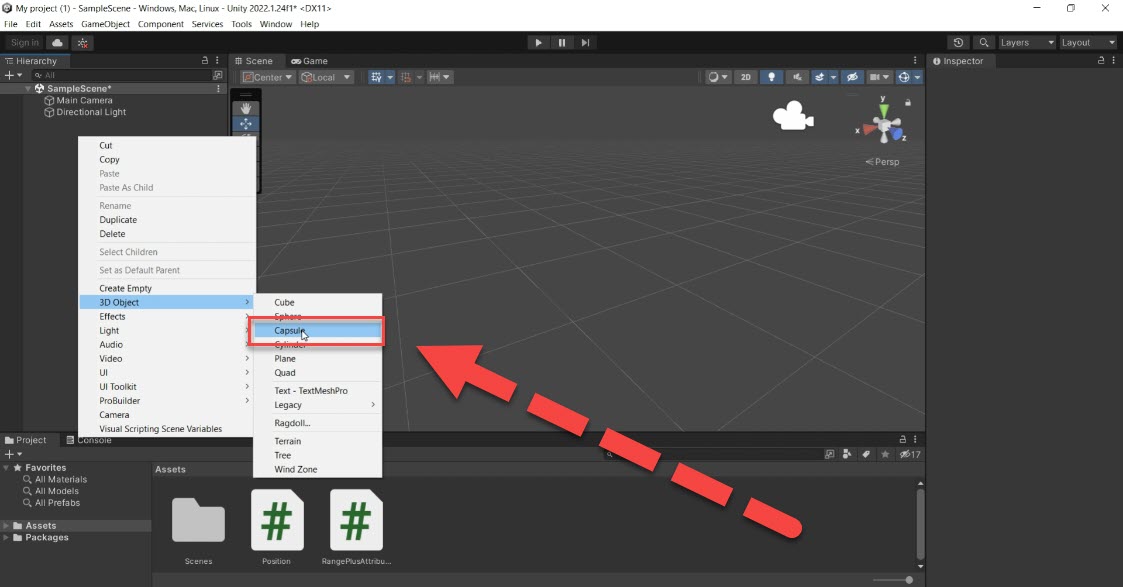
2. Add the position script component to the object by searching for it in the inspector.

3. Start tweaking the movement and positioning of your game object using the available controls.
Conclusion
Congratulations! You have successfully learned how to add a position script to your game objects in Unity. By utilizing the provided sliders and C# scripting techniques, you now have complete control over the precise positioning and movement of your objects. Remember to experiment, fine-tune, and explore additional possibilities. Keep creating amazing experiences with Unity, and stay tuned for more exciting tutorials.
You can use this free unity asset to tweak the position of your gameobject easily. simple add the position script to your gameobject and now you can change the position by changing the px , py and pz in the inspector. be sure to also add the RangePlusAttribute to your project as it will help you to change the minimum and maximum value of the sliders inside the inspector and without needing you to edit the script manually.



Responses