Rotate3D
In this Unity C# tutorial for beginners and from the 3D modeling series, we will learn how to rotate a game object in the x,y, and z directions (Rotate3D).
Rotate Objects in Unity Using a Simple C# Script
Unity is a powerful game development engine that provides developers with a wide range of tools and features. One of the essential aspects of creating engaging and interactive games is the ability to manipulate objects in 3D space. In this tutorial, we will explore how to rotate objects around the X, Y, and Z axes using a simple C# script in Unity.
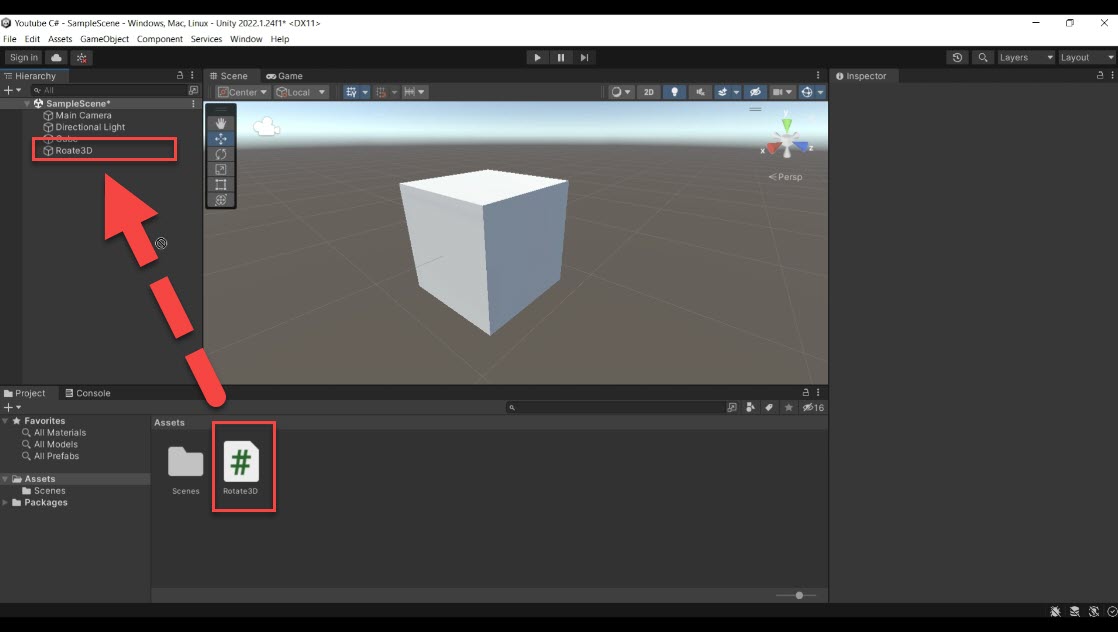
Step 1: Downloading the Rotate 3D C# Script To begin, you’ll need to download the “Rotate 3D” C# script from here. The script allows us to rotate objects easily and efficiently. Once you have downloaded the script, import it into your Unity project by dragging and dropping it into the Assets folder.
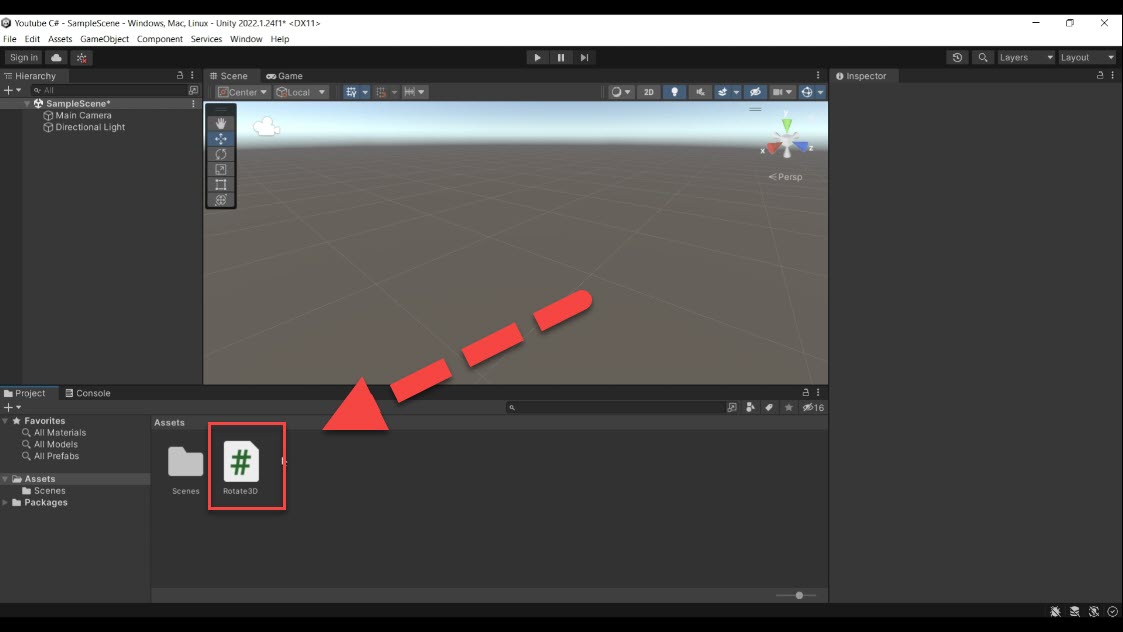
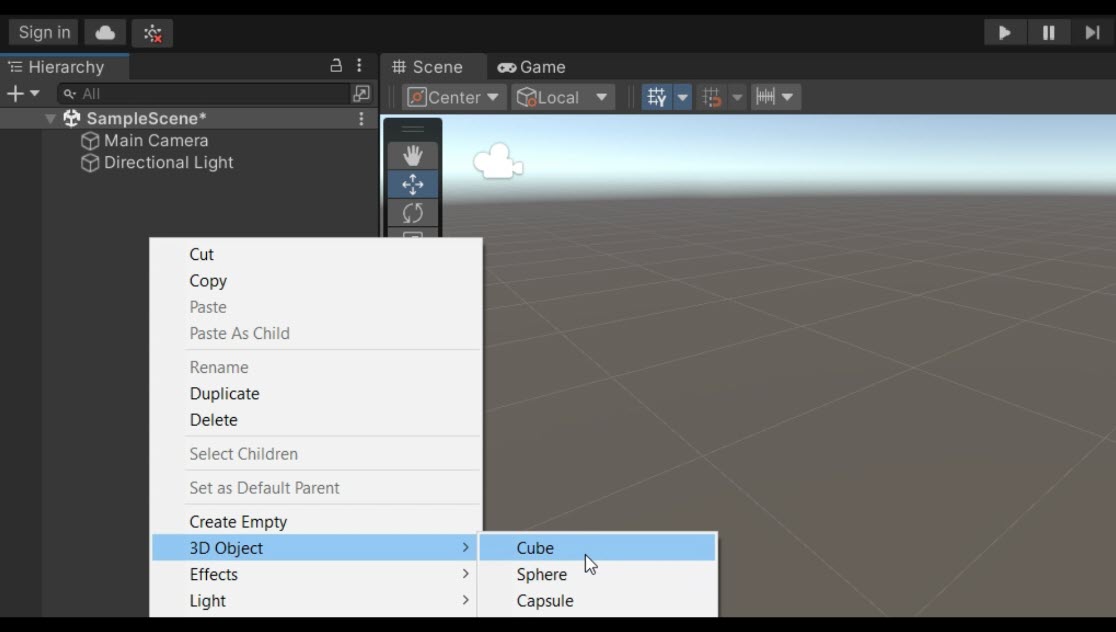
Step 2: Creating the Object and the Rotation Container Next, let’s create a 3D object to apply the rotation. In this tutorial, we will use a cube as an example.
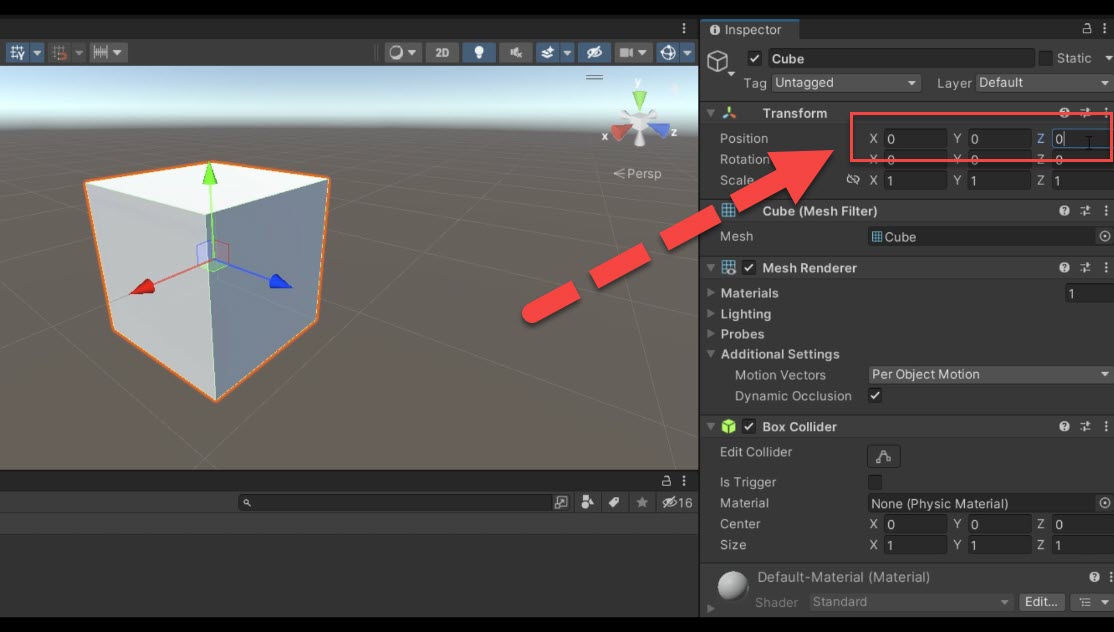
Place the cube at the coordinates (0, 0, 0) to ensure it is at the center of the scene.
Now, create an empty game object and name it “Rotate3D.”
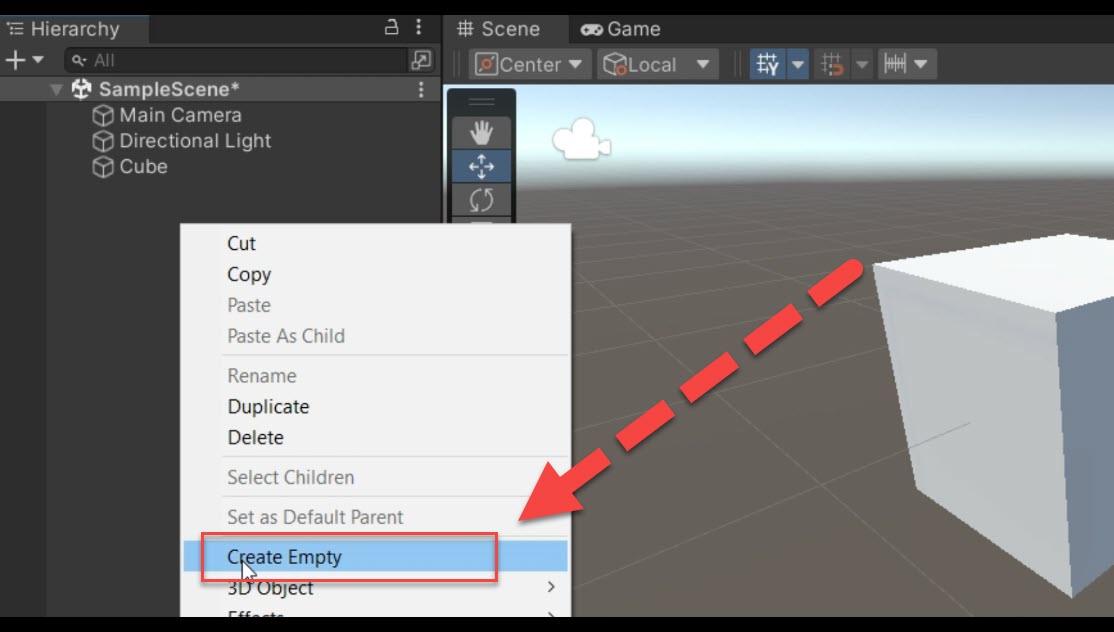
This object will serve as a container for the rotation script. Drag and drop the “Rotate 3D” script onto the “Rotate3D” game object.
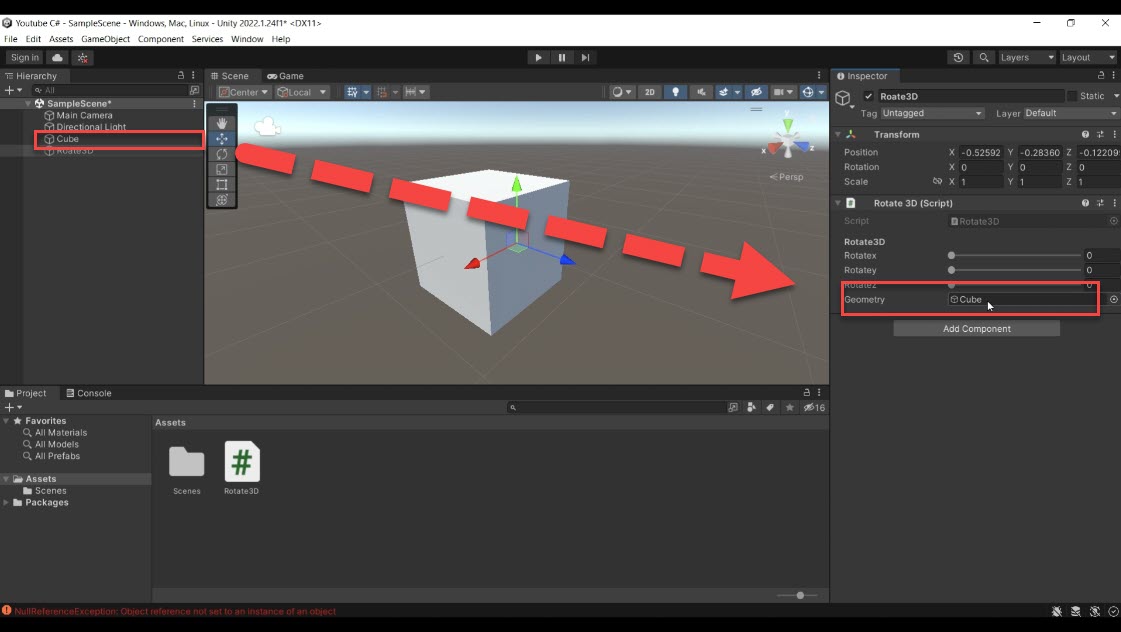
Within the script, you will notice a geometry container. Drag the cube object onto the geometry container and make sure its position is set to (0, 0, 0).
Step 3: Understanding the C# Script Let’s take a closer look at the C# script. First, ensure that you have included the “UnityEngine” library. Additionally, add the “ExecuteInEditMode” attribute to enable script execution in the Unity editor.
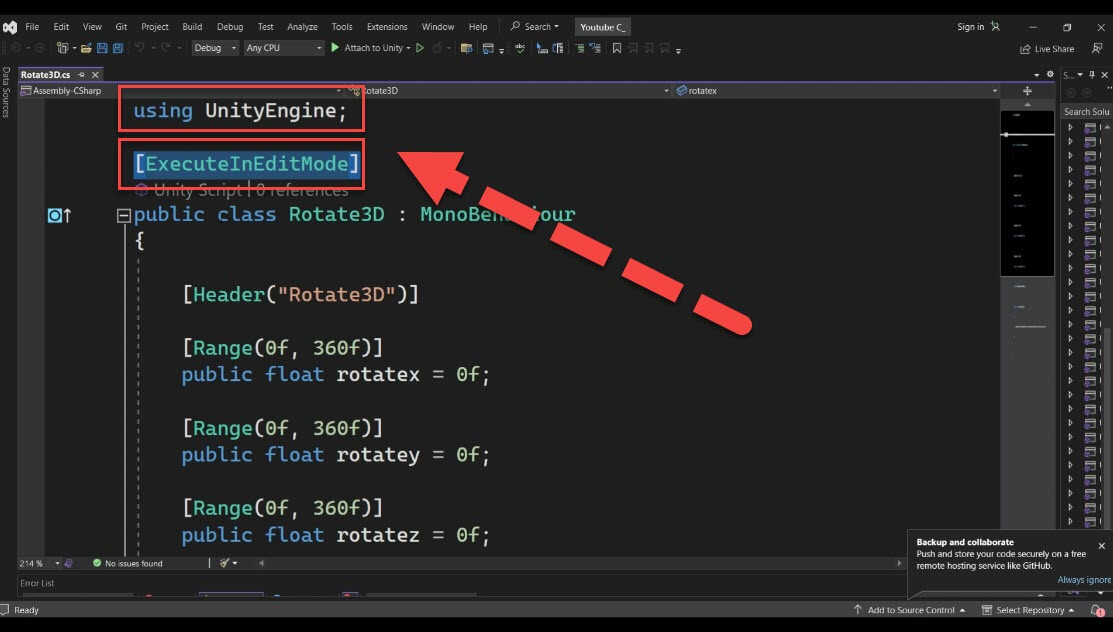
The script contains a public class named “Rotate3D.” This class includes three sliders: rotateX, rotateY, and rotateZ. These sliders allow you to control the rotation around the X, Y, and Z axes, respectively. The default value for all sliders is set to zero.
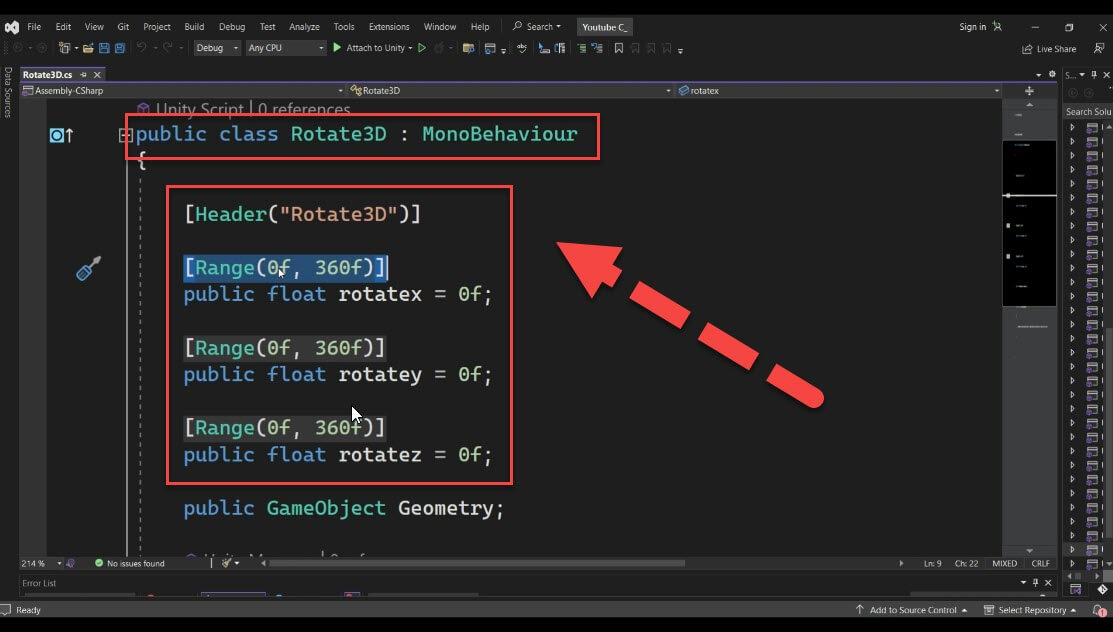
Within the script, we also define a public GameObject variable called “geometry.” This variable serves as a container for the object you want to rotate. By dragging and dropping the object onto the “geometry” container in the Unity inspector, you can associate it with the rotation script.
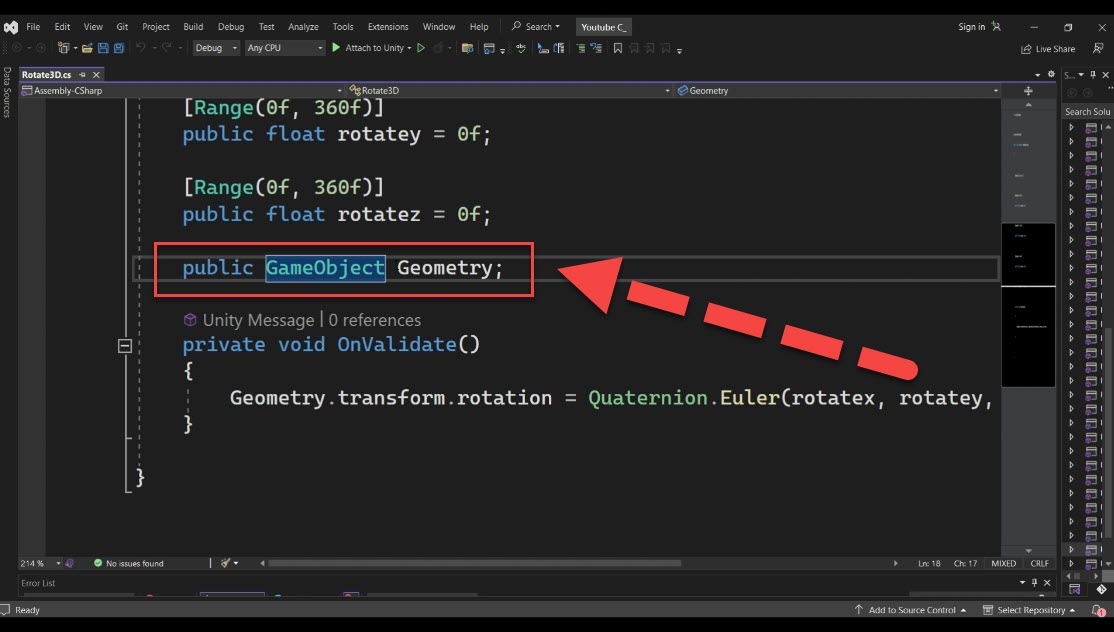
Step 4: Implementing the Rotation To rotate the geometry, we need to modify the “OnValidate” function in the script. This function is automatically called when the script is loaded or when the slider values are changed. To apply the rotation, we use the “transform.rotation” property of the geometry object.
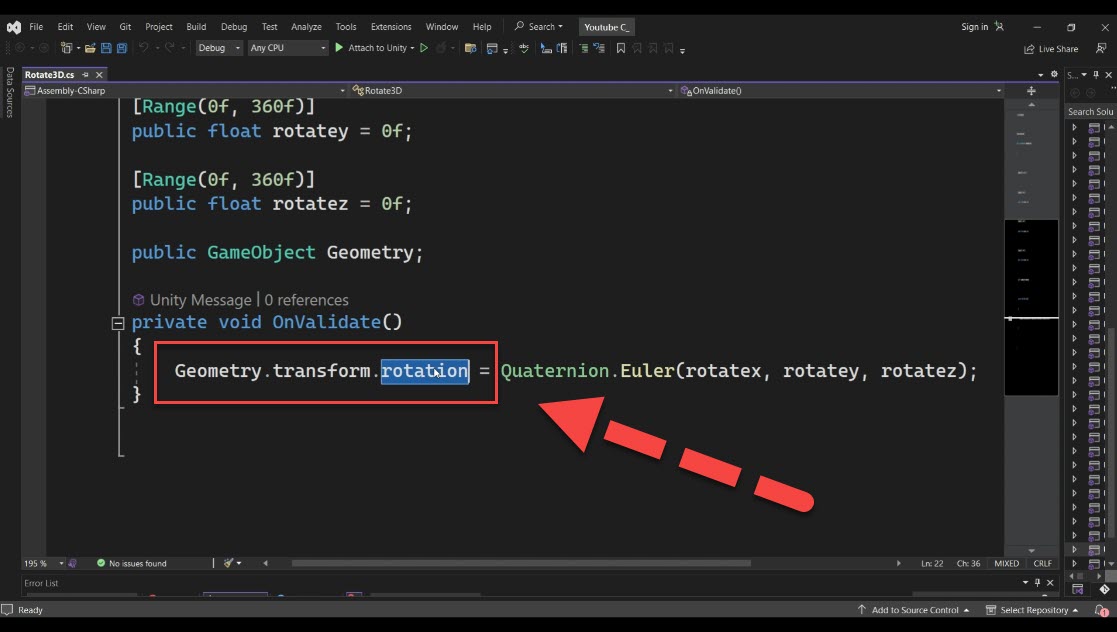
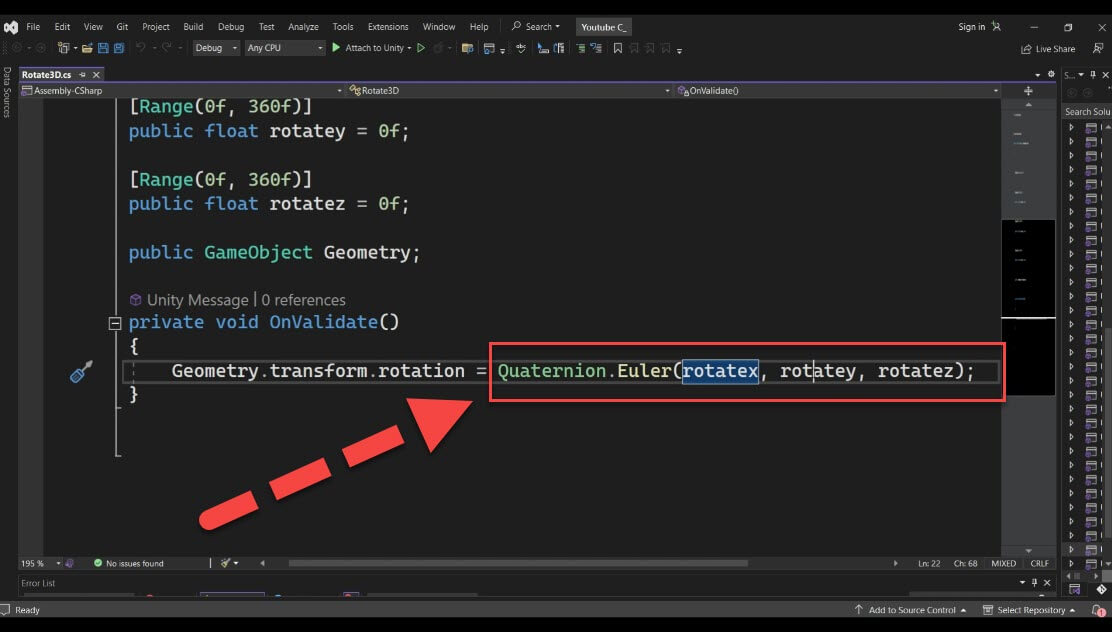
By setting the rotation property to a new “Quaternion.Euler” with the specified X, Y, and Z values, we can rotate the object around the desired axes. The X, Y, and Z values correspond to the rotateX, rotateY, and rotateZ sliders, respectively.
Step 5: Testing the Rotation To test the rotation, make sure the cube is selected in the scene view. Adjust the rotateX, rotateY, and rotateZ sliders in the inspector to observe the cube rotating around the corresponding axes. Ensure that the position of the cube is set to (0, 0, 0) to ensure the rotation occurs around its center.
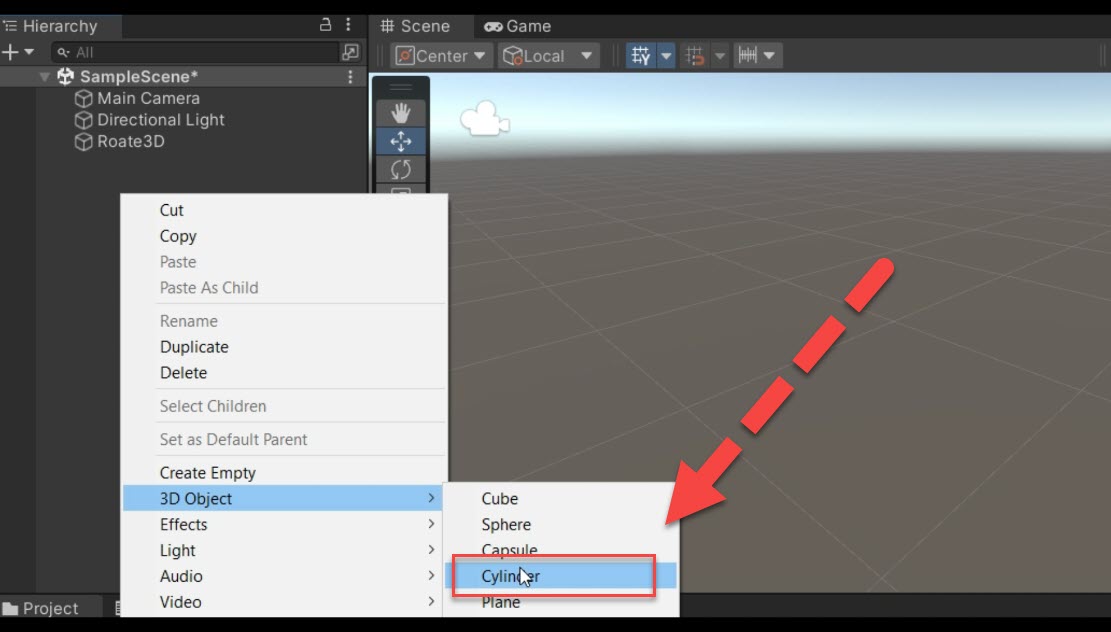
You can also apply the same rotation script to other objects in the scene. For example, create a cylinder by right-clicking on the scene and selecting “3D Object” > “Cylinder.” Set the cylinder’s position to (0, 0, 0) and associate it with the “Rotate3D” game object. You’ll notice that you can now rotate the cylinder around the X, Y, and Z axes as well.
Conclusion
In this tutorial, we explored how to rotate objects in Unity using a simple C# script. By following the steps outlined above, you can easily implement rotation functionality for your 3D objects. This allows you to create dynamic and interactive experiences in your Unity projects.
Remember to download the “Rotate 3D” C# script from here and import it into your project. Create a rotation container object and associate it with the script. Then, drag and drop the object you want to rotate into the geometry container. Adjust the rotateX, rotateY, and rotateZ sliders to control the rotation around the respective axes.
With this knowledge, you can enhance your game development skills and create captivating gameplay mechanics. Experiment with different objects and rotation values to achieve the desired effects in your projects.
Download the c# script from the below link: https://plugpea.com/?attachment=374&document_type=document&download_document_file=1&document_file=5


Responses